So for this final post regarding the table legs we are going to finish off the upper table leg support pieces. These four pieces "one for each table leg" will attach to the top of the table leg against the table frame and strengthen the leg to the table frame.
These pieces won't be visible to people so you don't have to use the most perfect looking piece of stock material. I grabbed some extra stock and rip cut it to a width of just under 4"!
Since the actual table frame is 4" wide I wanted to make sure you didn't see this piece from under the table. So, to begin set your table saw to 3- 14/16" and rip cut the board to this width.
NOTE: Make sure the board length is at least 35" long to cover all four pieces.

Below you can see the board after the rip cut and ready to be sectioned into four pieces.

Since this support piece will be attached at a 45 degree angle, you will be cutting each end at a 45 degree angle to match! You can use a number of methods to make this cut: Miter saw, table saw, even a skill saw! I prefer the table saw with the blade set at 45 degrees! It's easy to cut each piece since you cut one end then flip it over and cut the other end! Done!
Then length of the piece is 6 - 1/8" long "on the inside measurement"!
NOTE: Don't try to cut each piece to the exact measurement! It's easier to cut one piece at a time to just over the correct length and then trim it down it small passes on the table saw so it fits the piece in place flat and snug!!
Below you can see a support piece after it's been cut on the table saw with the two ends at 45 degree angles!

Here I'm trimming off the edge in small passes to get the piece to the exact measurement needed!


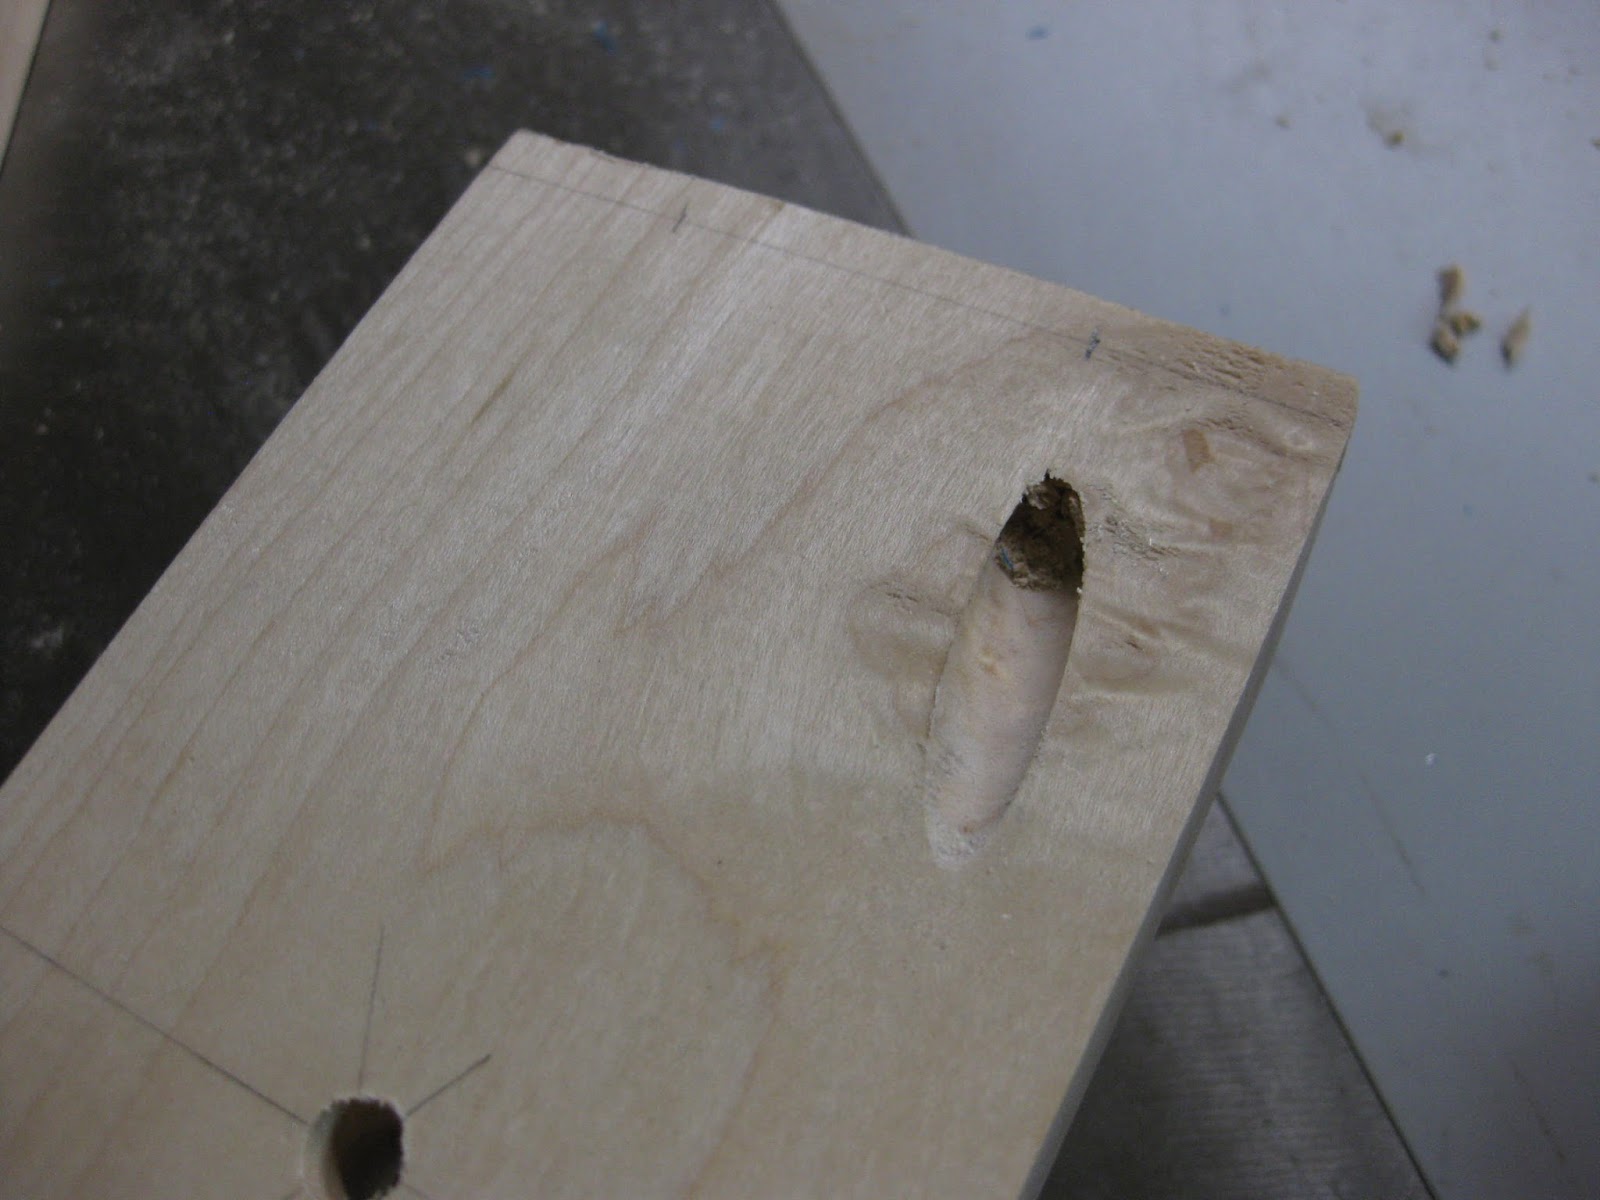
When you have the first piece cut you need to drill the hole for the support bolt! Below you can see the measurement of the bolt as it sits on the table leg. You can see that the top of the bolt is at the 2" mark from the BOTTOM of the table leg routed area!!
We need to transfer this measurement onto the support piece.


Now do the same thing on the opposite corners.

Now make a pencil mark that goes down through the center of the X so you can measure off the 2" from the bottom to create the bolt hole.

Below you can see the pencil hole marked on the center line and directly below the 2" pencil mark from the bottom of the piece. This is where you will be drilling your hole for the leg support bolt! You can use a 5/16" drill bit to drill this hole.


When drilling the hole make sure you expand the hole by moving the drill in a circle while drilling. This will help widen the hole yet not make it too wide to support a 1/4" washer!
To widen the hole you just turn the drill at an angle while drilling and move the drill around in a circle on the piece. You only need to angle the drill at about 80 degrees.


Now it's time to use the KREG pocket hole jig and drill the four screw support holes. First make a pencil mark on both edges of the short width sides. These are the sides that are a little under 4" in width. Take a ruler and make a pencil mark that will be a 1/4" from the edge of the support piece. See photo below.
CRITICAL: Make sure your line is no less than 1/4" wide or when you screw in the KREG screws they may pop through the surface of the table frame!!!

Once you have the edge pencil mark, make a check mark 1" from the edge of the piece ON THAT LINE you just made. This 1" pencil mark will be perpendicular to the line you just made. You will make two marks on each side of the support piece for a total of 4 marks. These pencil marks will be the starting location of the KREG portable pocket jig!


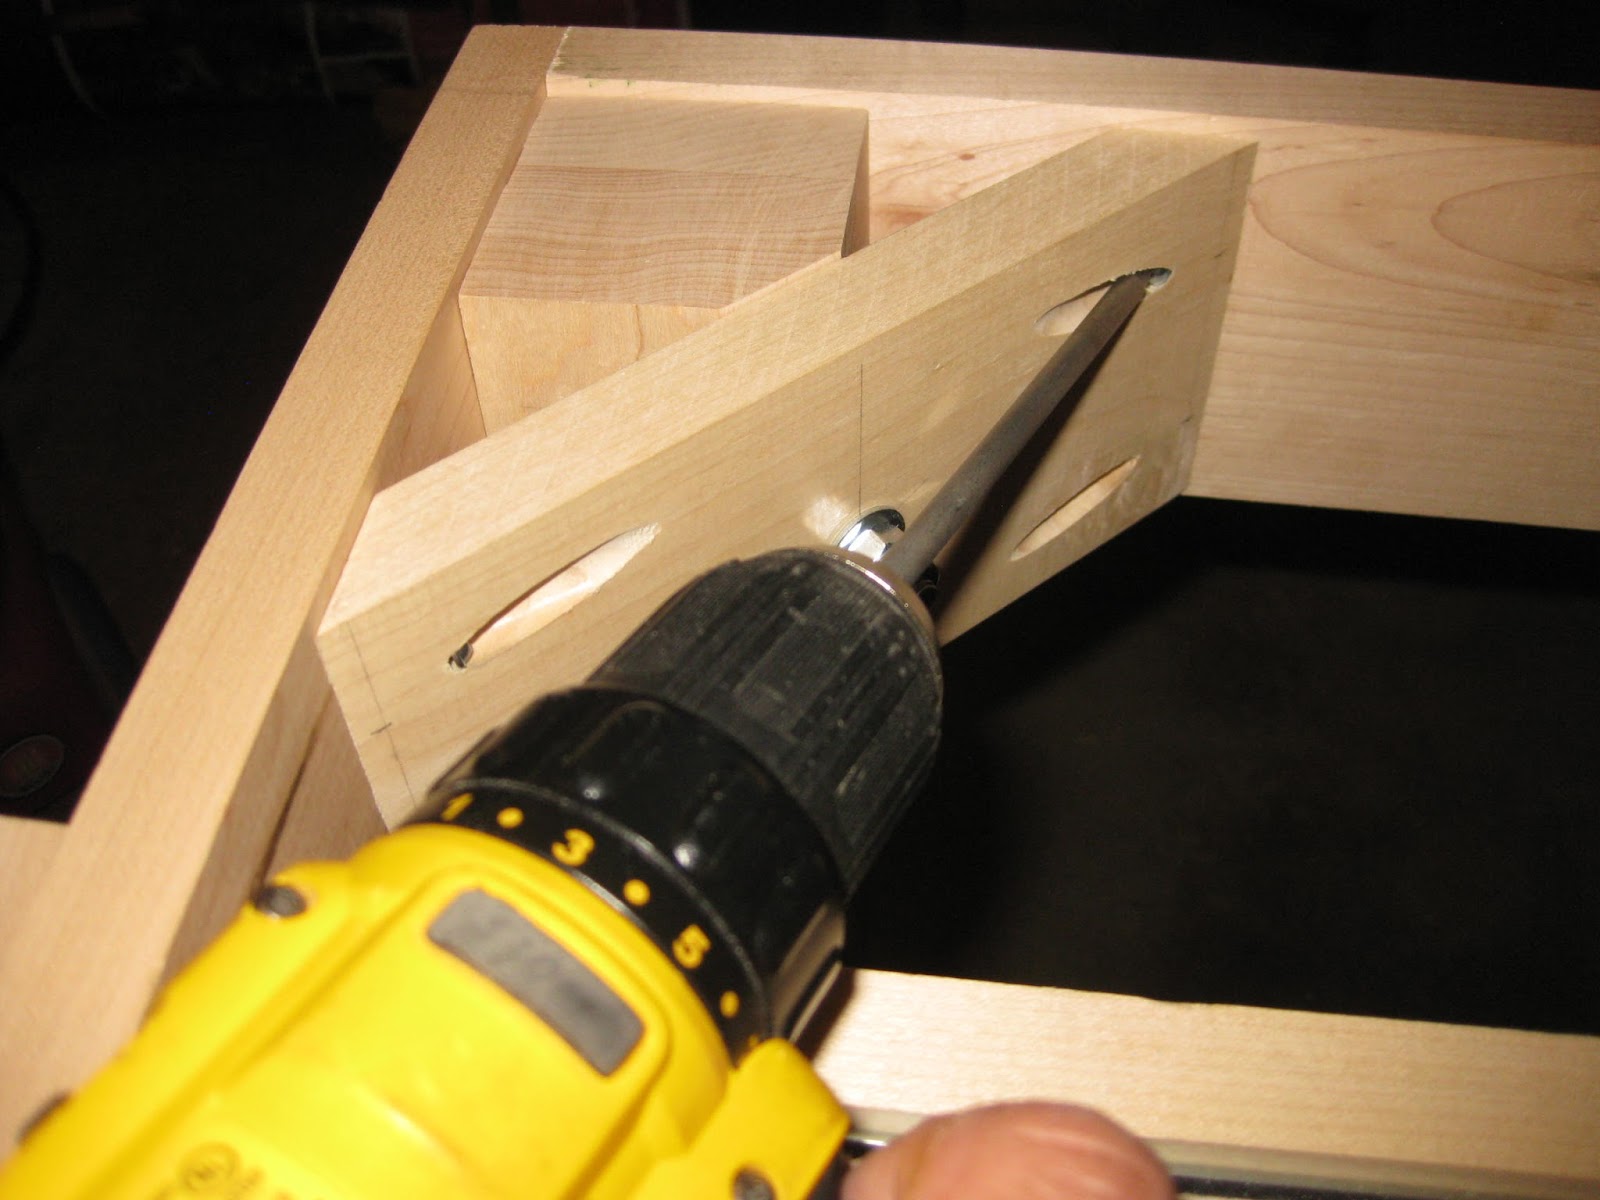
If you purchased the full KREG kit you should have the little portable pocket hole jig that allows you to drill a pocket hole on any material without having to use the main unit. As you can see below, this little hand held device comes with a KREG clamp and you can clamp it down in any direction on the piece of material!
To setup the portable pocket hole jig, place in on the support piece with the front center of the jig resting against the center mark you just created. Then make sure you rotate the jig so it points at an angle to the edge of the support piece as shown below!
NOTE: Make sure you have the front of the jig resting on the line and centered on the check mark.

In the two photos below, you can see how I've rotated the jig at an angle toward the edge of the support piece. The jig should just be hanging over the edge of the support piece when clamped down!
CRITICAL: The KREG clamps is an adjustable wrench with a wide end piece to hold the material. Make sure you tighten this clamp so it holds the support piece VERY secure while drilling. You need to put a lot of pressure on the drill to drill the pocket hole and if it's not secure you could end up pushing the jig down and drilling through the end of the support piece, making it useless!
The reason behind angling the pocket hole jig toward the outside of the support piece is to make it easier to clear the top and bottom of the table frame while screwing in the pocket hole screws. This slight angle helps you clear the table frame edge!


Hold the support piece in place and use the KREG drill provided to drill the pocket hole.
WARNING: Be careful where and how you hold the support piece while you are drilling! Be careful how you hold the support piece because the drill tip ends up drilling through the edge of the support piece just a little bit which can cut your fingers or damage the surface of what you are resting the support piece on.
KEEP YOUR FINGERS AWAY FROM THE END OF THE SUPPORT PIECE WHILE DRILLING!

Below you can see the first hole drilled into the support piece; only three more to go!!
Now let's drill the second pocket hole. Follow the same procedures at above to drill the second hole with the angle and the center spacing.


Below you can see the second hold drilled; one side complete!

Now we can rotate the support piece and drill the other side. Again, follow the procedures as above and drill each pocket hole at the proper angle and centering.


Below is what your support piece should look like when all four holes have been drilled! Notice the slight angle of each drill hole facing outward toward the edge of the support piece. This is going to save you when you drill the support piece into the table frame!

Below you can see the support piece "temporarily" set in place over the support bolt and bolted in place. You can see how each 45 degree end is flush with the table frame and the support piece is flat against the table leg!!
CRITICAL: The support piece MUST rest flat on all sides attached to the table leg and frame! Keep trimming down the sides of the support piece until it rest perfectly flat against the table leg and the 45 degree angles are flat against the table frame! If there is any kind of gap on any of these three locations, when you tighten the nut on the support bolt you could end up cracking the support piece or putting too much strain of the screws used to attach the table leg to the table frame!! Take your time and get this piece cut correctly, it will pay off in the end!


After you've drilled the support bolt hole and checked that each of the four support pieces fit the table frame flat and snug, go ahead and screw them into place.
Below you can see each hole being secured with a KREG screw and how you are able to clear the table frame due to the angled holes!!
WARNING: Make sure you don't over tighten the KREG screw or you'll break the screw head and render it useless which will cause you to remove the support piece and remove the broken screw!


Once you have all four screws secured in place, you can tighten the nuts to their final position. Again, try not to tighten the nuts too tight and make sure you add the second nut so it will lock the two nuts in place and you won't have to worry about them coming loose later on!
Below you can see the final setup of the support piece secured in place on the table frame and table leg!


See you soon!
No comments:
Post a Comment