Since our project will include drawers for gaming supplies, we're not building just a gaming table but a full purpose gaming table. We're building a gaming table that is constructed of two main sections: one being the main gaming table with arm rests and red satin gaming board and the other being the table support frame with all the drawers. The main gaming table will sit on top of the support frame and support the weight of the gaming table. As you've probably noticed by now when moving the main table around, IT'S HEAVY! Solid Maple hardwood is heavy and when you add all the arm rests that are placed on the inner gaming area of the table you have one heavy table.
With all this weight we don't want the inner plywood base to have to support all that weight and deal with all that stress, it's better to add support beams that will spread out the load. Our goal in this part of the project is to cut and install the [4] support beams that will be attached to the underside of the gaming table.
We're going to rip four identical pieces that will be the same length as the gap between the LONG side board or the shorter width of the table; 39 inches. Plus each piece of wood will be 1 - 1/4" deep, which is the depth under the plywood base. These four pieces will use the 3/4" wide material.
Let's start by taking one of the shorter stock boards that is at least 6 inches wide and over 40 inches in length. If you don't have a piece this wide or long you'll need to cut from your 8 foot stock of material.
We'll be using the table saw for this job and we'll be ripping the pieces to size. So let's setup the table saw to the correct measurements.
Go ahead a cut all five pieces, when finished you should have the following material.
NOTE: Remember when I said we always want our boards to have perfect 90 Degree ends because even though the lumber yard cuts the ends of the wood they don't always give a perfect cut! So that's what we'll do now; take each board and cut about 1/2" off the end of each board to give them a perfect 90 Degree edge!
CRITICAL: Make sure you double check the width measurement of the table and that it is 39" approximately, since you have been doing the cutting and gluing your measurements might be a little different then mine. They shouldn't be but I'm not there and I'm not doing the cutting! ;)
So after you measure the width "twice" go ahead and setup your table saw and fence as shown below "with the distance you measured" and cut each board to size making sure you use the new 90 degree end cuts we just made to go against the fence edge.
Now there are a number of ways to attach the boards to the underside of the table; you can just glue them, screw them, or both but the method I use is by preparing each board using a KREG Pocket Hole Jig. One of the greatest tools ever created IMHO!
What the KREG Pocket Hole jig does is help you pre-drill your joining material and give it a much stronger and more accurate connection joint with the two pieces of material! It's easy to setup, easy to use, and gives perfect connection joints with different sized material every time! Works on soft or hard material. Without a KREG system you'll need to make a jig or try and freestyle the screw holes to keep the material from splitting or cracking when you drill them together.
Since our material is 1-1/4" deep/wide, you just line up the board with the lines on the jig and secure the piece with the press clamp. I use a small 90 degree angle to make sure I have proper 90 degree alignment.
The material we're using is 3/4" thick, which you will need to know to setup the drill stop-lock piece. This stop-lock is what determines how deep the drill will go into the material for screws that will be used to secure the two pieces together.
You've probably noticed the strange tool I'm using to measure the thickness of the wood; this is a micrometer. I highly recommend you pick one up "it doesn't have to super expensive and can be made of plastic" because they are great for when you want to get an accurate thickness measurement of the material you've cut!
Below is a picture of the Micrometer I use all the time! It's sturdy, accurate and fits in your pocket!
The drill bit stop-lock is set to a depth depending on the thickness of the material you are joining: 1/2", 3/4", up to 1-1/2" thick. The material we're using is 3/4" [as shown above] so the drill bit stop-lock will be set to 3-1/2" or 2 on the guide template as shown below:

When you have everything setup and securely locked in place, start drilling each of the two holes on the end of the board as shown below. Apply even pressure when pushing the drill bit into the guide "its a self guiding template" and don't push too fast or the holes won't be smooth and clean.
WARNING: The KREG drill bit is incredibly sharp and can cut you very easily so please be careful when handling it!
The image below is what your board should look like when you finish drilling the two holes.

Here are all five boards ready to be secured to your table!
If you haven't already done so go ahead and flip your table over and let's measure out the distances for each of the support beams. It's an easy calculation: You have a width of 50 inches and you have four boards you need to spread across that 50 inch gap. You take the width of the gap, which is 50 and divide it by # of beams + 1 "This is basically the number of gaps between each beam so everything is evenly spaced"! So, 50 / 5 = 10 inches. This means, starting at one end you measure 10 inches and make a mark, then go another 10 inches and make a mark, and so on. See the images below to find out each measurement.
I use a small square to mark off each gap measurement! Make sure you line starts from the inside of the table where the board will be attached.
Use a long clamp or one of your pipe clamps to secure the board within the gap, centered on the lines. This will help hold the board in place while you screw it together.
Make sure you push down on the board piece against the plywood when you screw it secure so it will help in two ways:
1. It will put pressure on the plywood in the gap and keep it from moving around.
2. It will make it so the board is hidden and you wont see it under the edge of the table.
NOTE: If you want more strength in the joint go ahead and add a little wood glue to the end of the wood piece before you secure it to the table.
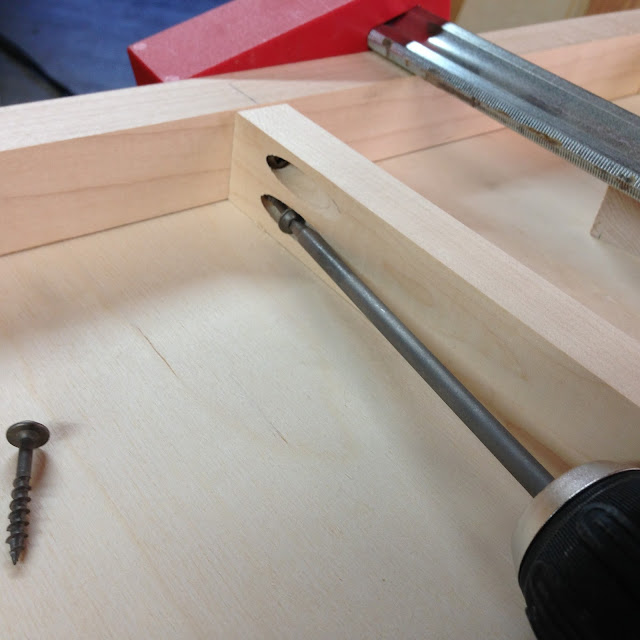
Go ahead and screw in the two screws with the bottom first and the top second. You will need to use the long extension since it's hard to get the drill in that close to the wood due to the approach angle.
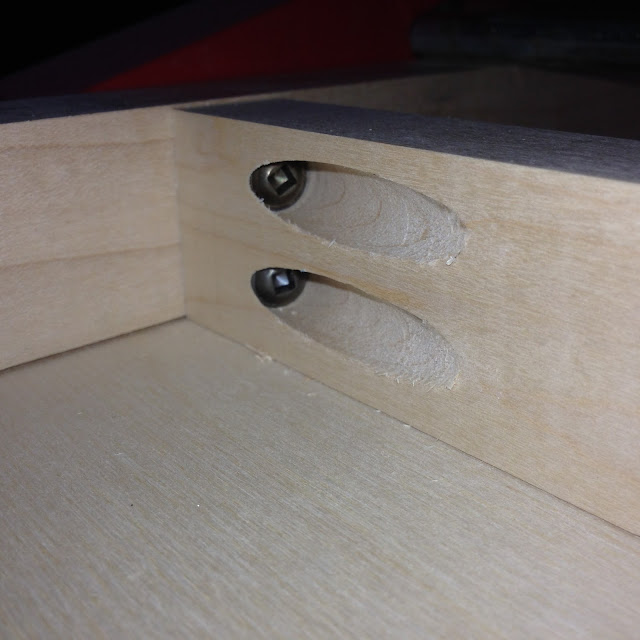
Here are a couple photos of both screws firmly in place!
NOTE: Notice the 1/16" gap above the wood piece to help hide it from view when seen from the side of the table! Plus you can see that the plywood has bee pushed up and is more secure within the gap; preventing it from moving around.
The photo below is what the underside of your table should look like when the beams are added to the bottom and secured with screws.
At this point the main table border is complete and all that is needed now "for the table part" are the arm rests and the inner gaming board with red cover.
We will go over the process of putting on the batting and cloth for the gaming board in the next post!
See you soon!


No comments:
Post a Comment