Now you might be asking yourself "Planks? What do mean by surrounded by planks?"
Well, since I'm doing this table a little differently in that I'm going to make removable arm rests that sit on planks that border the edge of the gaming board. The removable arm rests are going to be 5" wide wood pieces that sit inside the table and are in front of each player. These wood arm rests, when installed, define a smaller playing area but allow the players to lean on the table with their forearms or elbows while playing a game. The arm rests can then be removed in sections to provide different game size areas or allow for a full sized playing area on the gaming board when all arm rests are removed.
To support the arm rests and keep them at the same height as the table top "since they won't be glued in and I don't want them resting on the cloth of the gaming board" we'll need [4] planks that will lie inside the inner table edge against the table wall and surround the gaming board. The height of the planks will be above the gaming board so they will take the weight of the arm rests and not touch the cloth on the gaming board.
These planks will NOT be glued in and will also be removable to make it easier for you to remove the gaming board.
So, first let's cut the four planks then we'll cut the plywood to size so it fit within the planks.
The dimensions of the planks "as shown below" will be 1" x 13/16" for the LONG side planks.
To begin go ahead and grab one of your maple stock material that is at least 49" long and 5" wide, then cut it into strips "planks".
Above is your stock piece of material before I've made any cuts!
below are the four planks cut to size from the above stock!
CRITICAL: It's better to cut all four planks at the same time to the 1" height so they will all be exactly the same height when they sit along the inner edge of the table. The width dimension is the one that will change based on the size and fit of the gaming board. Some people will want it snug while others will want a larger gap. It's up to your preference.
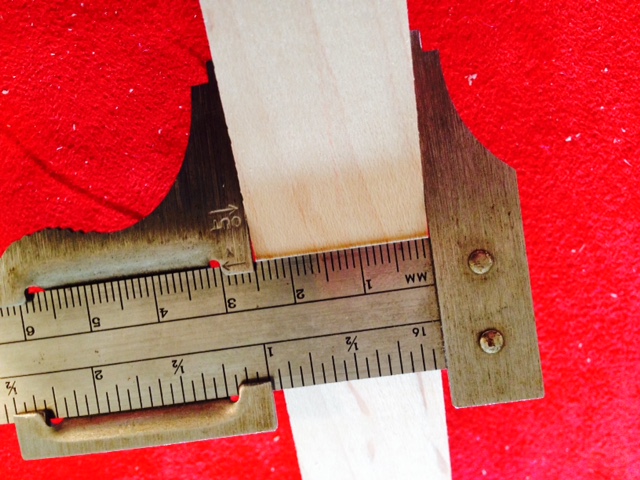
Below is the height of the LONG side plank, which is 1".
Below is the width of the LONG side plank, which is 13/16" approximately.
NOTE: Whenever I talk about a specific side of the gaming table I will use either LONG side or SHORT side to refer to that section/side of the table.
Check each piece and make sure they are flat and straight because you don't want to use any material that has a bend or twist in it.
Now measure the inner gap between the two long planks and cut the other two planks to this size. These two planks should fit snug against the inner edge of the table and between the two long planks!
NOTE: Try to cut one of these SHORT side planks a little less than the actual measurement so you can remove it later and be able to remove the gaming board along with it.
For the SHORT side planks the dimensions should be 1" x 3/4"".
Below is the height of the SHORT side plank, which is 1".

Below is the width of the SHORT side plank, which is 3/4".
Once each plank has a clean 90 degree edge, go ahead and cut the first two SHORT side planks to a length of 37-1/2". These two planks should fit snug within the inner edge of the table and between the two LONG side planks. Trim as necessary to get them to fit snug.
Now let's cut the main gaming board so it fits within this border. You want to leave a slight gap surrounding the gaming board to allow for the batting and cloth material that will cover it, this way it will fit snug within this border.
The first cut will be at a measurement of 37 - 1/4"! Take the 5' x 5' Birch Plywood and make this cut.
NOTE: The 1/4" gap will be filled up with the batting and the cloth that gets wrapped over the edge and glued to the bottom of the gaming board.
Below is the measurement you should have after your first cut!
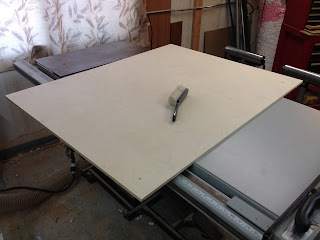
Now let's make the second cut at a measurement of 46 - 1/4"!
Below is the final board after your two cuts! Now before you run out and cover this with your cloth material you need to prepare the edge so it is nice and smooth with a rounded over edge. This will keep the material from snagging and make it easier to pull it tight over the edge when securing it to the board.
You can use two methods to prepare the board edge: routing with a an 1/8" round-over bit OR sanding! You can even do both if you want "which is what I did" and have a really smooth edge.
Below is an image of the 1/8" round-over bit locked in the router. These bits will produce a very small rounded edge on the birch plywood, which you can use OR finish off with some sanding.
I have an orbital sander so I will be sanding the edge to get the plywood edge clean and smooth and remove any burrs, splinters or grooves. When sanding just use a circular motions over the edge as if you were wiping a cloth over the edge from top to bottom.
CRITICAL: When you finished sanding or even just using the router, make sure you use a vacuum or shop vac to clean off all the sawdust from the plywood "both sides" and any material left from the router and/or sander. Too much sawdust will prevent the adhesive from sticking to the plywood and coating the plywood evenly and giving you a secure hold on the material.
Below is the finished Birch Plywood gaming board ready for covering!
Since I followed a really good YouTube instructional video covering the steps to create your very own gaming board, I thought instead of reinventing the wheel I might as well spread the wealth!
So before you go to the video link make sure you go through all the above steps to cut the plywood and surrounding planks.
If you measure the inside of the table you will have the following values: 48" and 39". Since we're not cutting the gaming board the full inner dimension of the table due to the surrounding planks! The gaming board will be a bit smaller that the full inner dimension, 46-1/4" x 37-1/4".
When you've finished cutting, sanding or routing all edges and sides of the plywood, you can now go to the YouTube video and watch how they put the covers on the game board.
THE VELVET GAMING SURFACE
When creating your gaming
surface you really don’t want to go cheap but you also don’t have to spend a
fortune. You can go with velvet or satin micro-suede and either one will work but in the long run the satin micro-suede will feel better, last longer, and look a lot nicer. The gaming board I plan on making will use
the following material:
½” Birch plywood – “You could use ¾” but it’s overkill and will be much heavier when
you need to remove it from the table.”
TANGO RED satin micro-suede cloth – 2 yards
¼” Batting –
Warm Soft & bright 100% poly “I decided against cotton since it will just
add weight and is too thick"
The cost of the materials
were:
$10.97 = Super 77 16.75 fl.
oz. Multipurpose Adhesive Spray
$10.78 = 2 yards of 1/4"
batting - 6' x 90"
$12.99 = 2 yards of Tango Red
solid satin micro-suede - 6' x 80" - "had a coupon for 50% off!"
$25.77 = 1/2" Birch
Plywood 5' x 5'
Total = $60.51 before taxes!
Below is my finished REMOVABLE gaming board surrounded by the four planks!
NOTE: I recommend you use two people to do this job because you can get the material much tighter when someone else is holding one end of the cloth and the other person is lowering the board on the material
https://www.youtube.com/watch?v=xSO6_UR2S3E
I want to give a big shout out and thanks to the guys at Meeplesonmeeples
http://www.meeplesonmeeples.com
They put together a great instructional video and it's the same one I used to create my game board.
In the next post we'll cover creating the arm rests.
See you then.


Will the covered playing surface be removable? The note about 1/2" vs. 3/4" plywood seems to indicate that you can remove it if necessary. I've always thought that was a good idea, so if something happens you can easily clean it or reupholster one sheet of wood instead of trying to dismantle a table.
ReplyDeleteYes, I covered a separate 1/2" birch plywood with the batting and red micro suede, which is a removable board that sits on the other 1/2" birch fixed plywood base.
DeleteI've seen people use 3/4" so they can put a wood trim around the gaming board and cover the edge but a large piece of 3/4" plywood or MDF is freaking heavy and more weight just puts more load on the legs! True, if the gaming board gets damage or something gets spilled on it, you can just pull out the staples, and rip off the covering!!
I added REMOVABLE just so it would be more clear about how the gaming board works.
DeleteThanks
This comment has been removed by the author.
ReplyDelete